
{
"lat": 60.192059,
"lon": 24.945831,
"when": "2019-10-12T07:20:50.52Z"
}
Building a data source
Introduction §
In this guide we will explain how to build a new data source so it can be queried through the product gateway using IOXIO Sandbox Dataspace . These steps are the same on all IOXIO Dataspaces, while some might miss the particular data products mentioned here.
Prerequisites §
- Data that you want to provide.
- A data product definition that matches the data you have available.
- Ability to host an API that responds to POST requests on the public internet over the https protocol.
Choosing a data definition for your source §
You can find the available Data definitions in the menu.
If there is no definition for the type of data you want to provide, you can create your own definition by following the How to create data definitions guide.
What are we building? §
We need to build an integration that provides an API matching one of the available definitions. We'll use Meteorology/Weather_v0.1 as our reference example (view OpenAPI Spec , SwaggerUI or ReDoc ).
In this case it means that an API which accepts a POST request at the path /Meteorology/Weather_v0.1 needs to be created. It could for example be hosted at https://data-source-guide-example.demos.ioxio.dev/Meteorology/Weather_v0.1.
This endpoint will expect a POST request with a JSON payload, like this:
It needs to respond with a JSON payload that could look like this:
You can build this using your own preferred tools, or have a look at our simple example implementation .
Deploy and host your API §
Deploy and host your API anywhere you prefer. Note that IOXIO doesn't offer API hosting. For the next steps, you'll need the base URL (i.e., the part before the data product path) where your API is accessible, for example: https://data-source-guide-example.demos.ioxio.dev.
Register your data source in the Dataspace §
Ensure you have a group
Go to the dataspace and click on My groups. If you don't have a group, you will need to create one. The name of the group should relate to yourself, your company, or the data source. Some dataspaces have moderated group creation. If the page has a notice saying so, and you are unable to create the group yourself, please follow the instructions visible in the page to get a group. Note, that if your organization already has a group, you will need to ask your group's owner to invite you to the existing group.
Add your data source
Use the menu to navigate to My data sources. Press the + Add a data source button. In the Data product dropdown pick the definition that matches your API. Pick one of your groups in the dropdown for groups.
If you want to publish multiple data sources for the same definition using the same group, you can add a variant name to distinguish them from each other. Most likely you don't want to use this for your first data source and thus want to leave the field empty. In the Base URL enter the base URL at which your deployment is available. The help text shows where the API endpoint is expected to be available. The Base URL will not be displayed to other users and is only used by the dataspace to connect to your integration. All other applications must connect through the dataspace.
There's three options for the visibility:
- Private - The data source will be hidden from other users on the dataspace and protected by an additional X-Preview-Token header. Should be used when you want to test your own data source before making it available to others.
- Unlisted - The data source can be accessed by anyone who knows it exists, but will not be published in any listing of data sources on the dataspace.
- Published - The data source will be published on the dataspace for others to see.
The access to the data source can be controlled by different options (all options might not be available on all dataspaces):
- No access control - The dataspace will allow anyone to request data from the data source.
- Dataspace verified API tokens - The X-API-Key header will be required and verified by the dataspace. Once you save the data source with this setting you can manage which groups are allowed to access the data source. The members of the allowed groups will find the data source and instructions on generating valid API-tokens for this header in the Access control keys section of dataspace. The Verifying API tokens guide explains how you can verify the tokens in your data source and know which group was requesting the data.
For this tutorial, let's choose Unlisted for the visibility and Dataspace verified API tokens for access control. The filled in form would look like this:
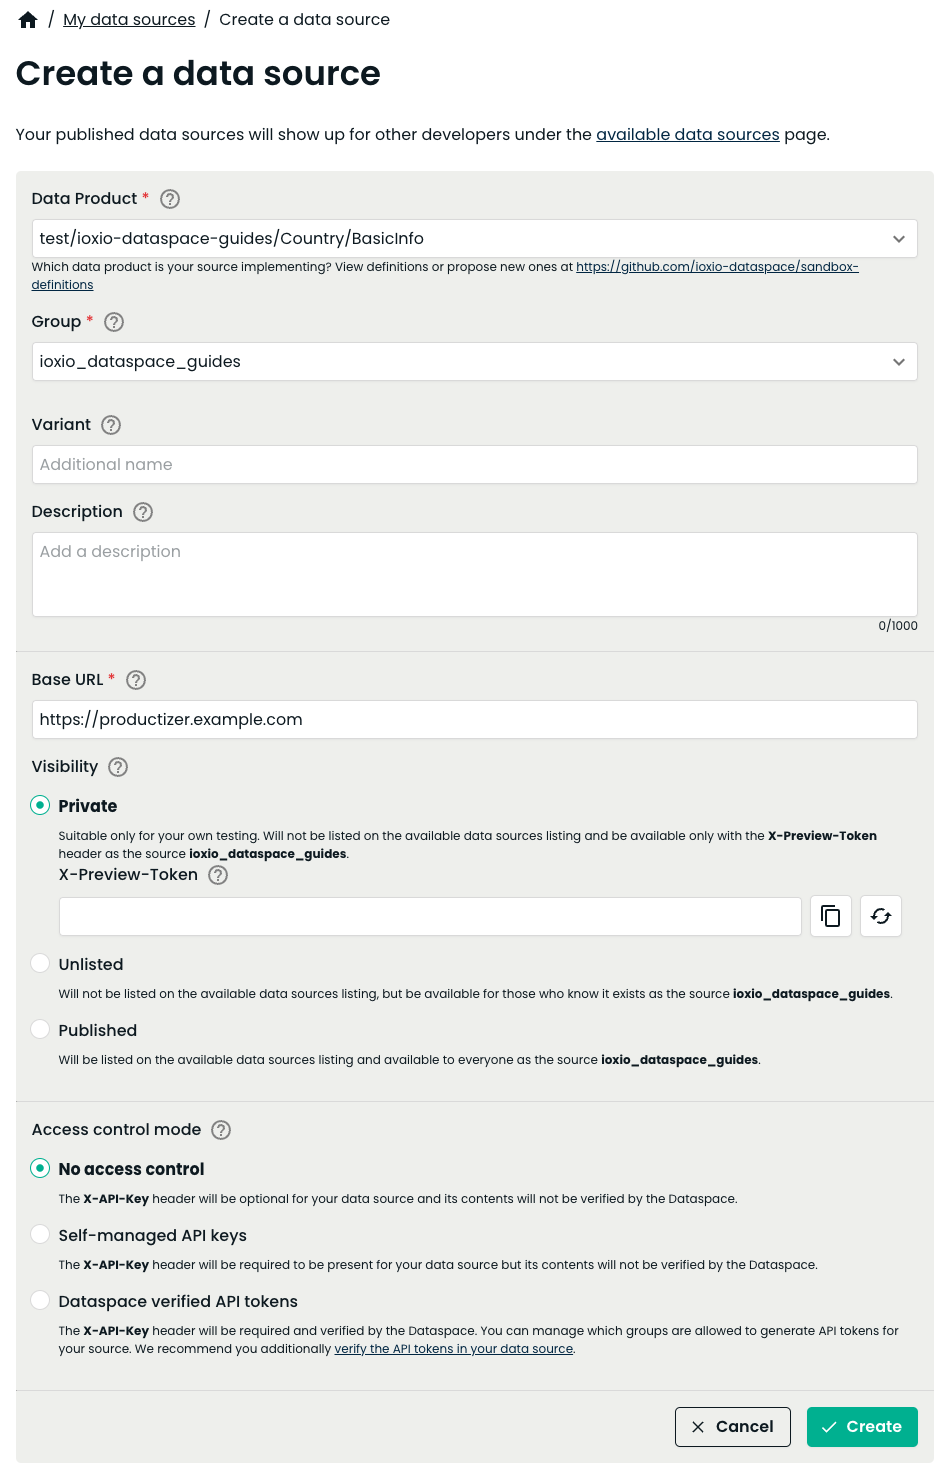
Press the Create button to create the data source.
Managing access to the data source §
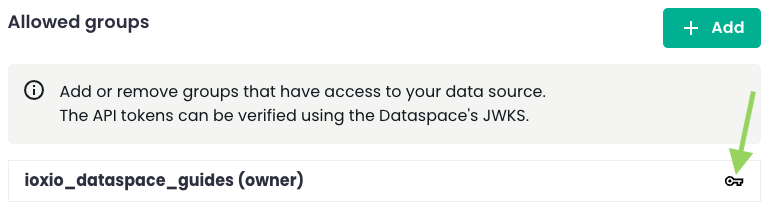
As we selected Dataspace verified API tokens when creating the data source, you will see the Allowed groups section at the bottom of the page once the source has been created:
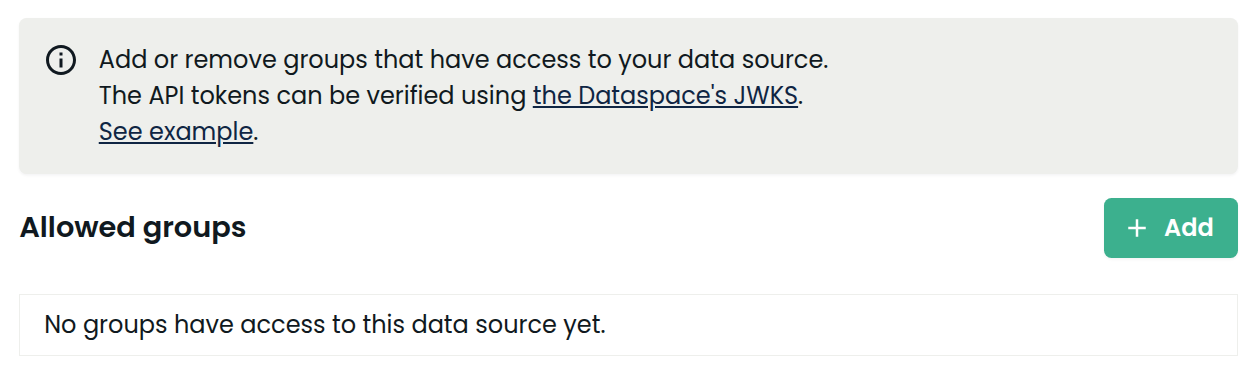
Each group that should be able to access data from this data source, needs to be in this list. Your own group is added automatically, but if you want to add other groups, click + Add, type in the name of the group, click + Add again.
You likely also want to check the API token in your own data source, at least for any real integrations accessing any data that shouldn't be publicly accessible, by following the instructions in the Verifying API tokens -guide. You can also use the name of the group, which is found in the sub field of the token, to restrict which group should have access to what data.
To test your data source, you can either follow the more in-depth steps in the next Test your data source section or head to the Test your data source using Swagger UI section a bit further down for a simpler and quicker approach.
Test your data source §
You should now be able to test your own data source by querying it through the product gateway. Below the Source field, you can also see the URL where you can make requests to the data source.

As our data source uses Dataspace verified API tokens, we'll need one before making a request.
You can generate one on the Access control keys page.

Find your data source in the list, click View.

Then you can generate an API token by clicking the Generate API token button or using the cURL example.
For example, you can use the cURL command-line tool to query it like this. Make sure to replace the URL, adjust the data to match your data source's expected payload, and include a recently generated token in the X-API-KEY header.
Note: As long as your datasource remains published or unlisted, you will not need to use the X-Preview-Token header. If the access control mode is changed to private, the header should be added to the request (the value can be found on the data source Edit page).
A successful response will look something like:
In case you make a request that causes an unexpected response to be generated by your integration, like a 404 Not found message, the product gateway will respond with a 502 to indicate there was an error in the integration:
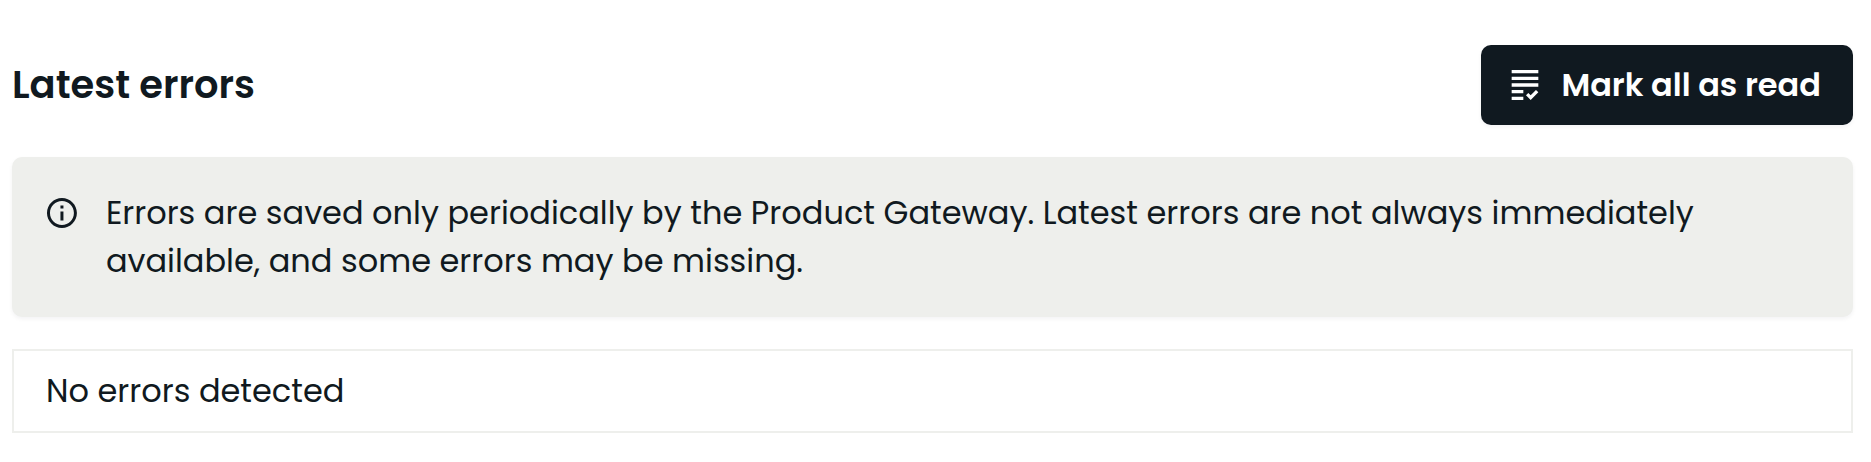
Note: if the data source response has errors, it gets logged into the errors section on the data source edit page after a short while:
Test your data source using Swagger UI §
The quickest and easiest way to test your data source is using these steps with Swagger UI.
From the edit data source view, you can quickly jump to the Access control keys for your source by pressing the key icon in the list of Allowed groups section.
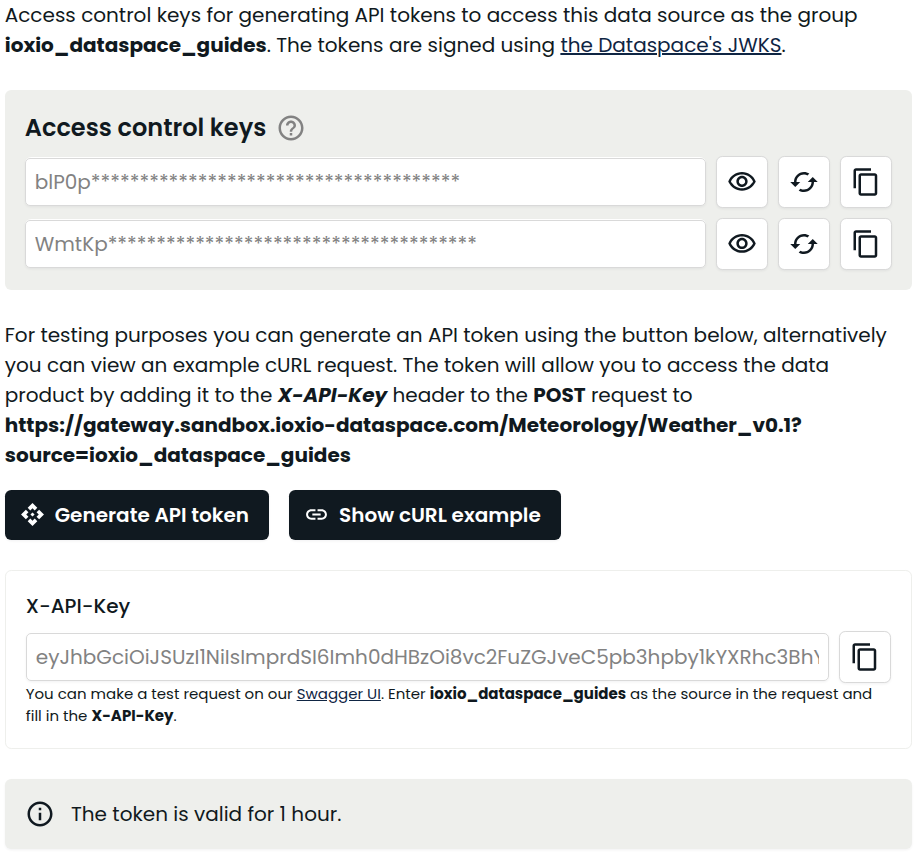
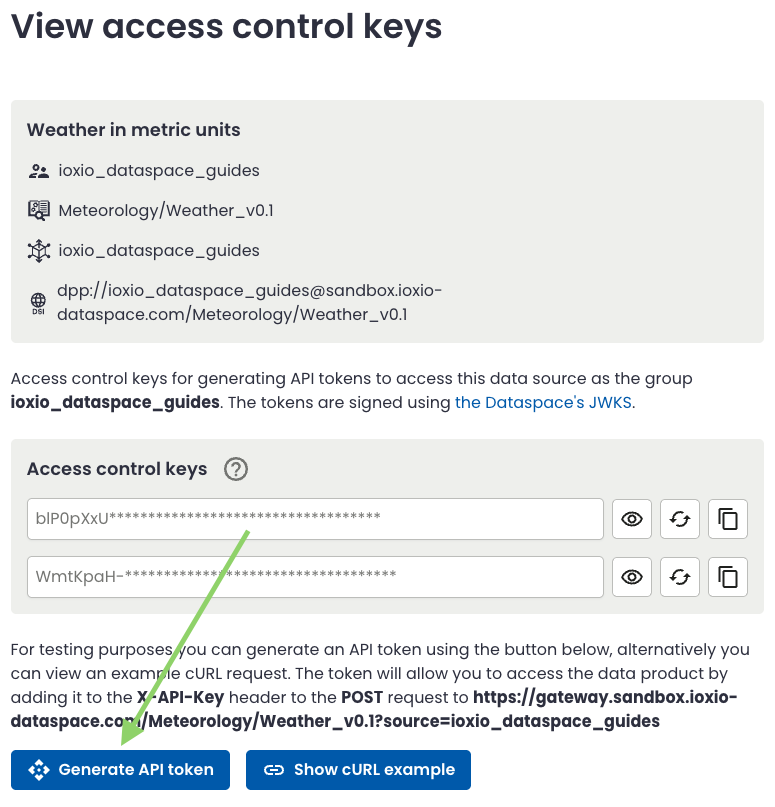
Alternatively you can open the Access control keys from the menu and open the details for your own source.
On the View access control keys page press the Generate API token button. This will for convenience use one of the long-lived access control keys and generate a short lived API token (typically valid for about an hour) and display it to you for easier testing.
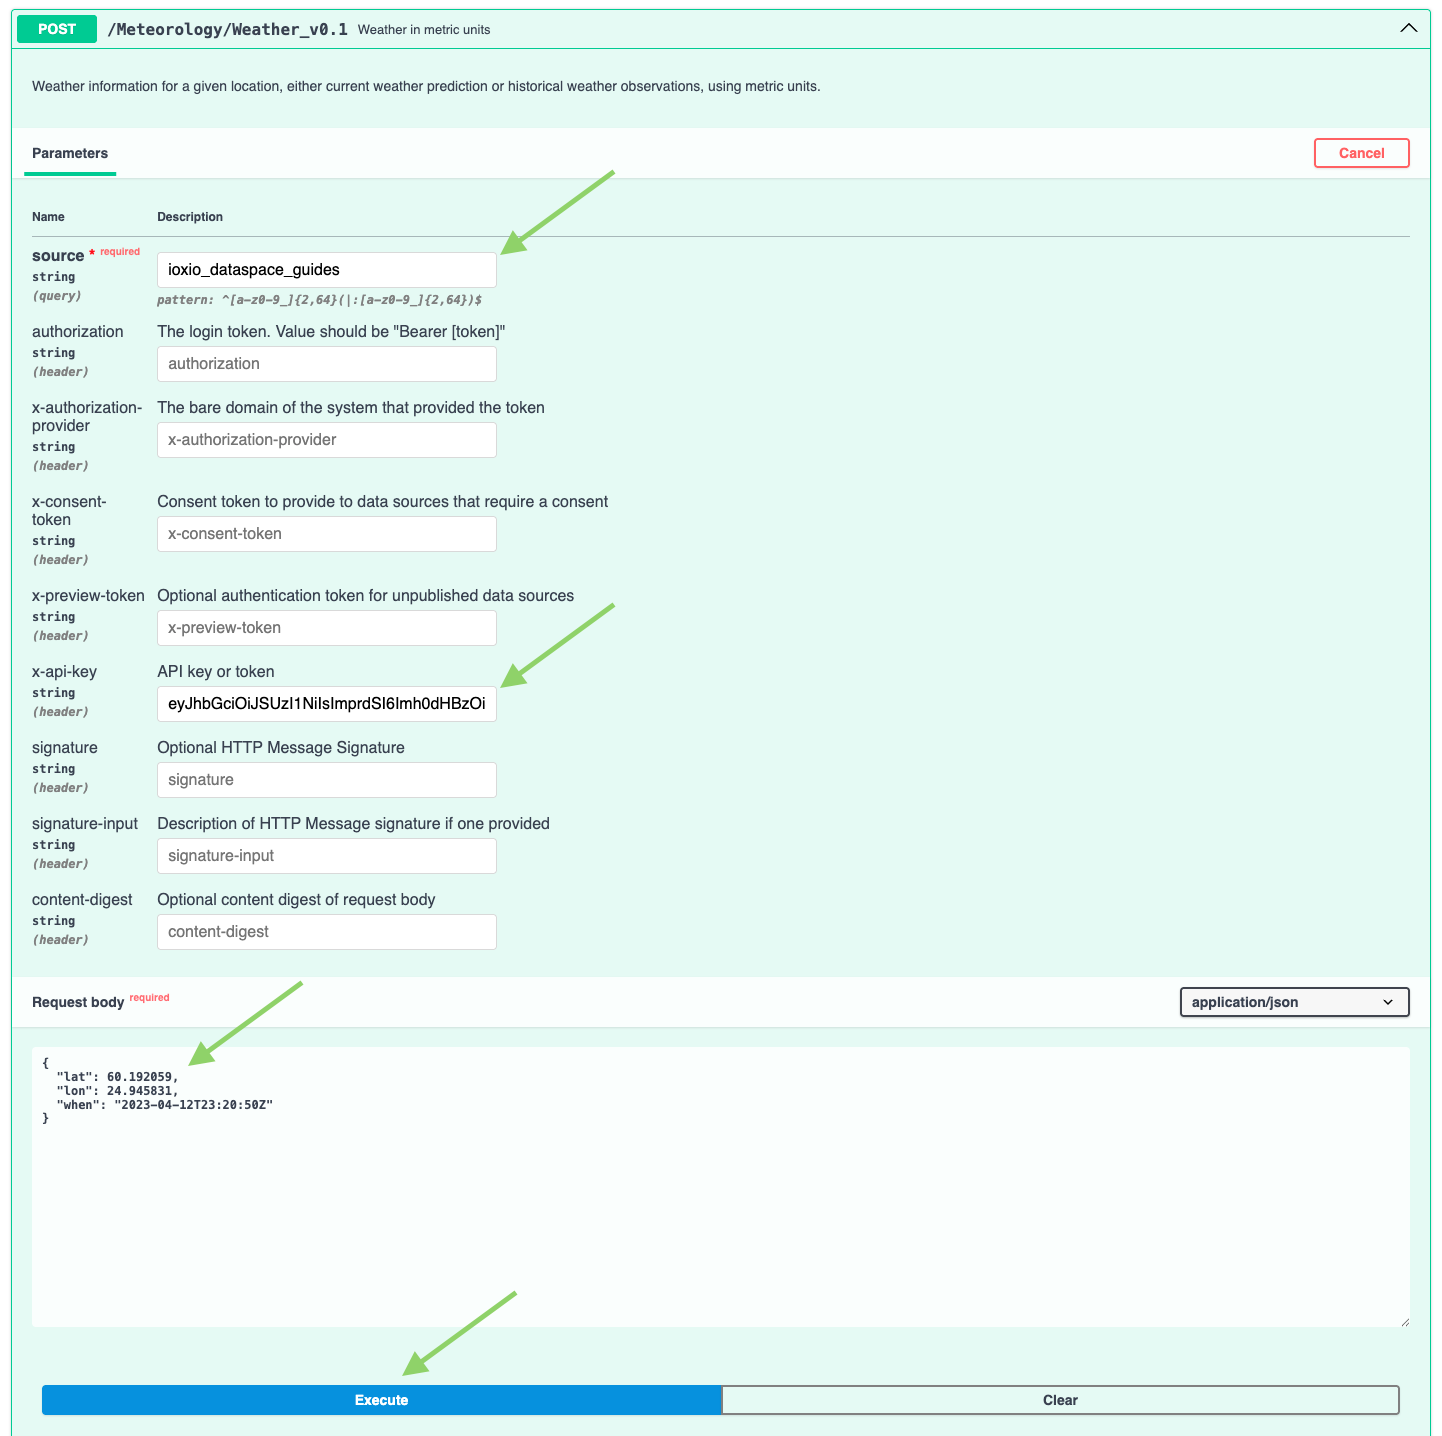
Copy the generated API token, make a note of the source value and open the Swagger UI link.
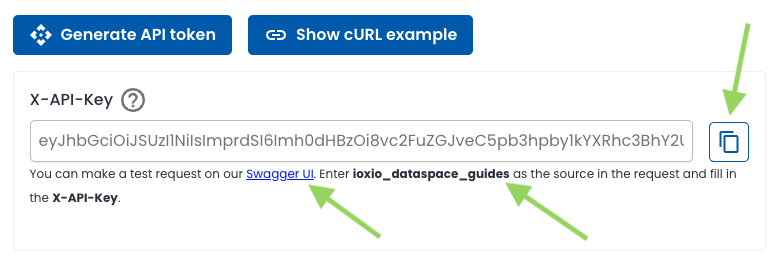
Press the Try it out button in Swagger UI.

Enter the name of the source (the one you were requested earlier to make a note of) and paste in the API token you copied in the x-api-key field. Do any changes you want to the request body and press the Execute button to perform the request.
Swagger UI will in the Responses section show you the curl command corresponding to the request that it made and also show the status code and body of the response.
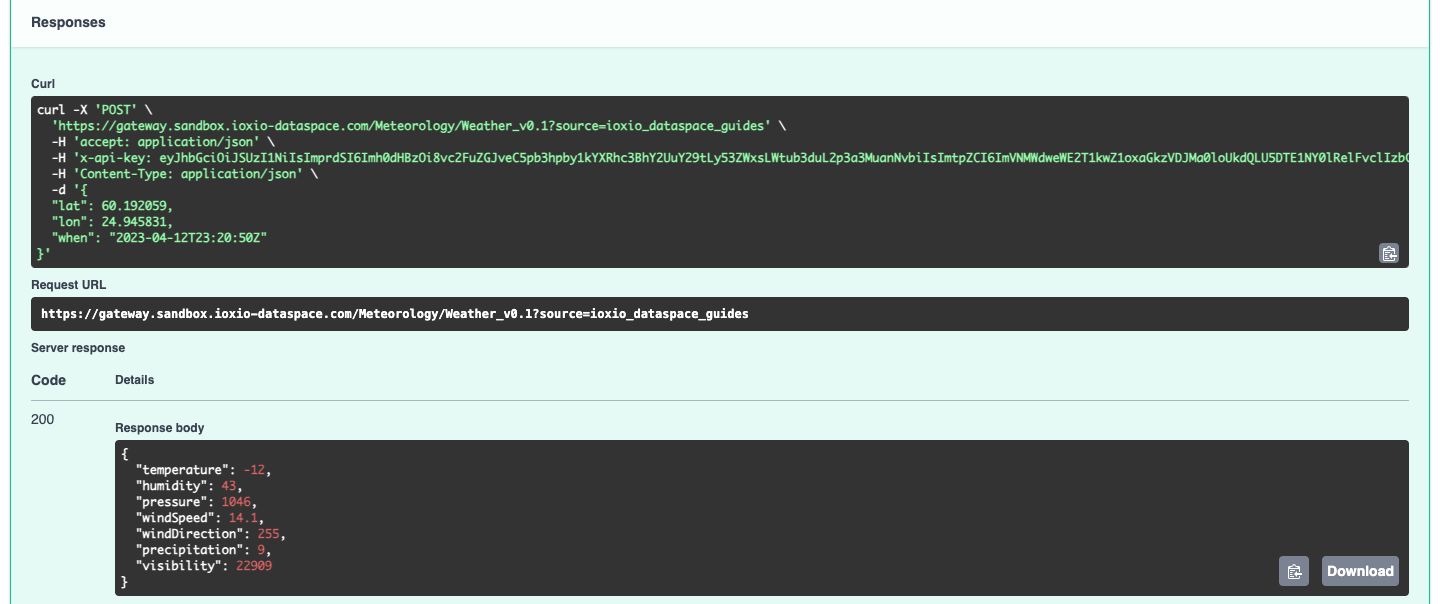
Check the status and response is as you expect or in case of an error check the details in the error message. Please note that the API tokens are typically valid for only about an hour, so if you do a lot of testing you might encounter the API token is not valid for this source or it has expired message, which means you need to go back to the Access control keys page and generate a fresh one to use.
Publish the data source §
When you've verified the data source works as intended you can publish the data source by selecting it in the list of your data sources, pressing the Edit button and switching the visibility to Published and press the Save button. When it's published, it will be listed to all users in the Available data sources section.
On this page